In this tutorial, we’re gonna create Python 3/Django CRUD with MySQL that uses Django Framework for building REST APIs in Docker container for environments. This tutorial is a full replica of Bezkoder’s (www.bezkoder.com/django-crud-mysql-rest-framework/) tutorial on his website but with updated syntax in 2022.
You’ll know:
- How to create Dockerfile
- Using docker-compose.yml
- Using adminer for database management
- How to setup Django to connect with MySQL Database
- How to define Data Models and migrate it to MySQL
- Way to use Django REST Framework to process HTTP requests
- Way to make Django CRUD Operations with MySQL Database
Django CRUD with MySQL overview
We will build REST APIs using Django REST Framework that can respond to any request to create, retrieve, update, delete and find data posted by title or published status.First, we setup Dockerfile and docker compose for development environments then we will create empty database in MySql using adminer. Then we will setup Django Project with a MySQL Client. Next, we create a REST API app, add it with Django REST Framework to the project. Next, we define data model and migrate it to the database. Then we write API Views and define Routes for handling all CRUD operations (including custom finder).
The following table shows overview of the REST APIs that will be exported:
Methods | Urls @ localhost:5000/ | Actions |
GET | api/app | get all posted data |
GET | api/app/<id> | get post by id |
POST | api/app | Add new post |
PUT | api/app/<id> | update post by id |
DELETE | api/app/<id> | remove tutorial by id |
DELETE | api/app | remove all data |
GET | api/app/published | find published post |
GET | api/app?title=[kw] | filter post by title contains ‘kw’ |
Architecture
Let’s look at the diagram below, it shows the architecture of Django CRUD Rest APIs App with MySQL database:
HTTP requests will be matched by URL Patterns and passed to the Views. Views processes the HTTP requests and returns HTTP responses (with the help of Serializer). Serializer serializes/deserializes data model objects. Models contain essential fields and behaviors for CRUD Operations with MySQL Database.
Technology
- Python 3
- Docker
- Adminer (you can use other database management)
- Django
- djangorestframework
- pymysql
- django-cors-headers
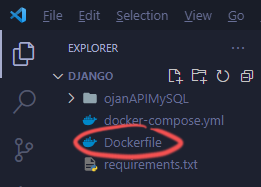
Project structure
This is the project structure:
# Use an official Python runtime as a parent image
FROM python:latest
# Set the working directory to /app
WORKDIR /app
# Copy the current directory contents into the container at /app
#COPY ./smartfix /app
ADD requirements.txt /app/
# Install any needed packages specified in requirements.txt
RUN pip install --trusted-host pypi.python.org -r requirements.txt
# Make port 80 available to the world outside this container
EXPOSE 80
Requiremnts
In requirements.txt :
Django
pymysql
djangorestframework
django-cors-headers
version: '3.1'
services:
mysqldb:
image: mysql:5.7
environment:
MYSQL_ROOT_PASSWORD: rootpassword
MYSQL_DATABASE: testdb
MYSQL_USER: user
MYSQL_PASSWORD: userpassword
ports:
- "33060:3306"
volumes:
- "../mysql/my.conf:/etc/mysql/conf.d/config-file.cnf"
- "../mysql/data:/var/lib/mysql:rw"
adminer:
image: adminer
ports:
- 8080:8080
djangoapp:
build: .
volumes:
- ".:/app"
ports:
- "5000:80"
depends_on:
- mysqldb
# - solr
entrypoint: /bin/sh -c
command:
# - 'until cd /app; do echo "retying in 3 sec...";
# - sleep 3; done; echo "volume mounted";
# - cd /app/ojanAPIMySQL; python manage.py runserver 0.0.0.0:80'
- 'tail -f /dev/null'
Notice I have a MySQL database shared folder outside the project structure.
Docker setup was done! Lets run this command in terminal :
docker-compose up
Next using VS Code we attach shell to container and start coding.
Setup new Django project
Let’s create a new Django project with command:
django-admin startproject ojanAPIMySQL
Now we open ojanAPIMySQL/ojanAPIMySQL/settings.py and add the Django REST framework to the INSTALLED_APPS array here.
INSTALLED_APPS = [
'django.contrib.admin',
'django.contrib.auth',
'django.contrib.contenttypes',
'django.contrib.sessions',
'django.contrib.messages',
'django.contrib.staticfiles',
# Django REST framework
'rest_framework',
]
Connect Django project to MySQL (mysqldb)
Open your browser and go to localhost:8080 to access adminer application. Login using root and create empty database called "testdb".
Then we need a MySQL Client to work with MySQL database. In this tutorial, we’re gonna use pymysql. Open ojanAPIMySQL/ojanAPIMySQL/__init__.py and write following code to import pymysql to our Django project
import pymysql
pymysql.install_as_MySQLdb()
We also need to setup MySQL Database engine. So open ojanAPIMySQL/ojanAPIMySQL/settings.py and change declaration of DATABASES:
DATABASES = {
# 'default': {
# 'ENGINE': 'django.db.backends.sqlite3',
# 'NAME': BASE_DIR / 'db.sqlite3',
# }
'default': {
'ENGINE': 'django.db.backends.mysql',
'NAME': 'testdb',
'USER': 'root',
'PASSWORD': 'rootpasword',
'HOST': 'mysqldb',
'PORT': '3306',
}
}
Setup new Django app for Rest CRUD API
Run following commands to create new Django app tutorials:
cd ojanAPIMySQL
python manage.py startapp app
Refresh the project directory tree and notice added files in the project. Now open ojanAPIMySQL/app/apps.py and edit it as below.
from django.apps import AppConfig
class MyAppConfig(AppConfig):
name = 'app'
Don’t forget to add this app to INSTALLED_APPS array in ojanAPIMySQL/ojanAPIMySQL/settings.py :
INSTALLED_APPS = [
'django.contrib.admin',
'django.contrib.auth',
'django.contrib.contenttypes',
'django.contrib.sessions',
'django.contrib.messages',
'django.contrib.staticfiles',
# Django REST framework
'rest_framework',
# Tutorials application
'app.apps.MyAppConfig',
]
We need to allow requests to our Django application from other origins. In this example, we’re gonna configure CORS to accept requests from 0.0.0.0:80 inside docker container which is also localhost:5000 in real world.
In ojanAPIMySQL/ojanAPIMySQL/settings.py, add configuration for CORS:
INSTALLED_APPS = [
'django.contrib.admin',
'django.contrib.auth',
'django.contrib.contenttypes',
'django.contrib.sessions',
'django.contrib.messages',
'django.contrib.staticfiles',
# Django REST framework
'rest_framework',
# Tutorials application
'app.apps.MyAppConfig',
# CORS
'corsheaders',
]
You also need to add a middleware class to listen in on responses, and set CORS_ORIGIN_ALLOW_ALL and add the host to CORS_ORIGIN_WHITELIST:MIDDLEWARE = [
'django.middleware.security.SecurityMiddleware',
'django.contrib.sessions.middleware.SessionMiddleware',
'django.middleware.common.CommonMiddleware',
'django.middleware.csrf.CsrfViewMiddleware',
'django.contrib.auth.middleware.AuthenticationMiddleware',
'django.contrib.messages.middleware.MessageMiddleware',
'django.middleware.clickjacking.XFrameOptionsMiddleware',
# CORS
'corsheaders.middleware.CorsMiddleware',
'django.middleware.common.CommonMiddleware',
]
CORS_ORIGIN_ALLOW_ALL = False
CORS_ORIGIN_WHITELIST = (
'http://0.0.0.0:80',
'https://0.0.0.0:80',
)
- CORS_ORIGIN_ALLOW_ALL: If True, all origins will be accepted (not use the whitelist below). Defaults to False.
- CORS_ORIGIN_WHITELIST: List of origins that are authorized to make cross-site HTTP requests. Defaults to [].
Define the Django Model
Open app/models.py, add Tutorial class as subclass of django.db.models.Model. There are 3 fields: title, description, and published.
from django.db import models
class Tutorial(models.Model):
title = models.CharField(max_length=70, blank=False, default='')
description = models.CharField(max_length=200,blank=False, default='')
published = models.BooleanField(default=False)
Each field is specified as a class attribute, and each attribute maps to a database column. "id" field is added automatically.
Migrate Data Model to the database
Run the python script :
python manage.py makemigrations app
The console will show:
Migrations for 'tutorials':
tutorials\migrations\0001_initial.py
- Create model Tutorial
Refresh the workspace, you can see new file app/migrations/0001_initial.py.
It includes code to create Tutorial data model:
# Generated by Django 4.1.3 on 2022-11-11 04:04
from django.db import migrations, models
class Migration(migrations.Migration):
initial = True
dependencies = [
]
operations = [
migrations.CreateModel(
name='Tutorial',
fields=[
('id', models.BigAutoField(auto_created=True, primary_key=True, serialize=False, verbose_name='ID')),
('title', models.CharField(default='', max_length=70)),
('description', models.CharField(default='', max_length=200)),
('published', models.BooleanField(default=False)),
],
),
]
The generated code defines Migration class (subclass of the django.db.migrations.Migration). It has operations array that contains operation for creating Customer model table: migrations.CreateModel().
The call to this will create a new model in the project history and a corresponding table in the database to match it.
To apply the generated migration above, run the following Python script:
python manage.py migrate app
At this time, you can see that a table for Tutorial model was generated automatically with the name: app_tutorial
Create Serializer class for Data Model
Let’s create TutorialSerializer class that will manage serialization and deserialization from JSON. It inherit from rest_framework.serializers.ModelSerializer superclass which automatically populates a set of fields and default validators. We need to specify the model class here.
app/MySerializers.py
from rest_framework import serializers
from app.models import Tutorial
class TutorialSerializer(serializers.ModelSerializer):
class Meta:
model = Tutorial
fields = ('id',
'title',
'description',
'published')
In the inner class Meta, we declare 2 attributes:
model: the model for Serializer
fields: a tuple of field names to be included in the serialization
Define Routes to Views functions
When a client sends request for an endpoint using HTTP request (GET, POST, PUT, DELETE), we need to determine how the server will response by defining the routes.
These are our routes:
/api/app : GET, POST, DELETE
/api/app/<id> : GET, PUT, DELETE
/api/app/published : GET
Create a urls.py inside app folder with urlpatterns containing urls to be matched with request functions in the views.py:
from django.urls import re_path
from app import views
urlpatterns = [
re_path(r'^api/app$', views.tutorial_list),
re_path(r'^api/app/(?P<pk>[0-9]+)$', views.tutorial_detail),
re_path(r'^api/app/published$', views.tutorial_list_published)
]
also, include this URL patterns in root URL configurations. Open ojanAPIMySQL/urls.py and modify the content with the following code:
from django.contrib import admin
from django.urls import path, re_path, include
urlpatterns = [
# path('admin/', admin.site.urls),
re_path(r'^', include('app.urls')),
]
Write API Views
We’re gonna create these API functions for CRUD Operations:
– tutorial_list(): GET list of tutorials, POST a new tutorial, DELETE all tutorials
– tutorial_detail(): GET / PUT / DELETE tutorial by "id"
– tutorial_list_published(): GET all published tutorials
Open app/views.py and write following code:
from django.shortcuts import render
from django.http.response import JsonResponse
from rest_framework.parsers import JSONParser
from rest_framework import status
from app.models import Tutorial
from app.MySerializers import TutorialSerializer
from rest_framework.decorators import api_view
@api_view(['GET', 'POST', 'DELETE'])
def tutorial_list(request):
# GET list of tutorials, POST a new tutorial, DELETE all tutorials
if request.method == 'GET':
tutorials = Tutorial.objects.all()
title = request.GET.get('title', None)
if title is not None:
tutorials = tutorials.filter(title__icontains=title)
tutorials_serializer = TutorialSerializer(tutorials, many=True)
return JsonResponse(tutorials_serializer.data, safe=False)
# 'safe=False' for objects serialization
elif request.method == 'POST':
tutorial_data = JSONParser().parse(request)
tutorial_serializer = TutorialSerializer(data=tutorial_data)
if tutorial_serializer.is_valid():
tutorial_serializer.save()
return JsonResponse(tutorial_serializer.data, status=status.HTTP_201_CREATED)
return JsonResponse(tutorial_serializer.errors, status=status.HTTP_400_BAD_REQUEST)
elif request.method == 'DELETE':
count = Tutorial.objects.all().delete()
return JsonResponse({'message': '{} Post were deleted successfully!'.format(count[0])}, status=status.HTTP_204_NO_CONTENT)
@api_view(['GET', 'PUT', 'DELETE'])
def tutorial_detail(request, pk):
# find tutorial by pk (id)
try:
tutorial = Tutorial.objects.get(pk=pk)
except Tutorial.DoesNotExist:
return JsonResponse({'message': 'Post does not exist'}, status=status.HTTP_404_NOT_FOUND)
# GET / PUT / DELETE tutorial
if request.method == 'GET':
tutorial_serializer = TutorialSerializer(tutorial)
return JsonResponse(tutorial_serializer.data)
elif request.method == 'PUT':
tutorial_data = JSONParser().parse(request)
tutorial_serializer = TutorialSerializer(tutorial, data=tutorial_data)
if tutorial_serializer.is_valid():
tutorial_serializer.save()
return JsonResponse(tutorial_serializer.data)
return JsonResponse(tutorial_serializer.errors, status=status.HTTP_400_BAD_REQUEST)
elif request.method == 'DELETE':
tutorial.delete()
return JsonResponse({'message': 'Tutorial was deleted successfully!'}, status=status.HTTP_204_NO_CONTENT)
@api_view(['GET'])
def tutorial_list_published(request):
# GET all published tutorials
tutorials = Tutorial.objects.filter(published=True)
if request.method == 'GET':
tutorials_serializer = TutorialSerializer(tutorials, many=True)
return JsonResponse(tutorials_serializer.data, safe=False)
Test the CRUD with APIs
Run our Django Project with command :
python manage.py runserver 0.0.0.0:80
Using Thunder Client extension for visual studio Code, we will test all the APIs above
1. Create a new Post using POST to localhost:5000/api/app
Body/Json Content
{
"title": "Tutorial CRUD",
"description": "Djanggo API with MySql ORM"
}
2. Retrive all post using GET to localhost:5000/api/app
3. Update a Post using PUT localhost:5000/api/app/<id>
4. Retrieve a single Postby id using GET localhost:5000/api/app/<id>
5. Find all Post which title contains ‘ud’: GET localhost:5000/api/app?title=ud
6. Find all published Post using GET localhost:5000/api/published
7. Delete a POst using DELETE localhost:5000/api/app/<id>
8. Delete all using DELETE to localhost:5000/api/app
Conclusion
Today, we’ve learned how to create Python 3/Django CRUD MySQL example Django Rest Framework for Rest APIs using Docker as development environment. We also know way to connect Django application with MySQL database, create a Django Model, migrate it to database, write the Views and define Url patterns for handling all CRUD operations.
Done! See you again...


Comments
Post a Comment